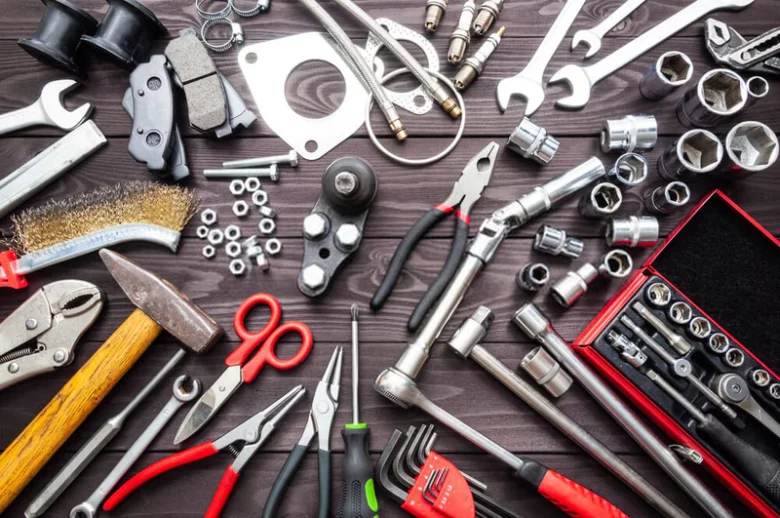
Maintaining your car can feel daunting, but with the right tools and a little know-how, you can tackle many tasks yourself. DIY car service isn’t just about saving money; it’s also empowering. Imagine confidently changing your oil or fixing a flat tire without waiting for roadside assistance. Having a well-stocked toolkit is essential to keeping your vehicle in top shape. Whether you’re an experienced mechanic or just starting out, we’ve compiled a list of the ten must-have tools that every DIY enthusiast should have on hand. Let’s dive into what you need for effective car maintenance!
Top 10 Essential Tools for Your DIY Car Maintenance Toolkit
Building your DIY car maintenance toolkit is an exciting journey. Each tool you add enhances your ability to address various issues that arise with your vehicle. With the right equipment, you’ll feel more confident tackling repairs and maintaining optimal performance.
From basic hand tools to specialized gadgets, having a diverse range at your fingertips makes all the difference. You don’t need every tool out there; focus on essentials that cover common tasks. This approach keeps things manageable while ensuring you’re well-prepared.
As you gather these vital tools, remember they will serve you for years to come. Investing in quality items pays off in convenience and reliability during car care duties.
Change Engine Oil and Filter
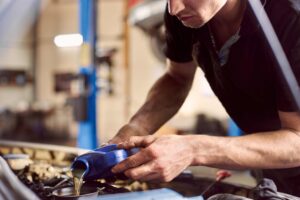
Changing engine oil and filter is a fundamental part of DIY car service. Fresh oil keeps your engine running smoothly, reducing friction and wear. Regular changes help maintain performance over time.
Start by gathering the necessary tools: an oil filter wrench, a drain pan, and the right type of motor oil for your vehicle. Make sure to let the engine cool down before you begin to avoid burns.
Once you’re ready, remove the old oil and filter carefully. Replace them with fresh components, ensuring there are no leaks afterward. It’s a simple task that can extend your car’s lifespan significantly.
Buff Out a Paint Scratch
A paint scratch can be a real eyesore on your car. Luckily, buffing it out is often possible with the right tools and techniques. Start by cleaning the affected area thoroughly to remove any dirt or debris.
Next, apply a small amount of polish or scratch remover onto a microfiber cloth. Gently rub it into the scratch using circular motions. This helps blend the damaged paint with the surrounding surface.
After that, wipe away any excess product and assess your work. If needed, repeat until you achieve a smooth finish that restores your vehicle’s appearance without requiring professional help.
Fix a Flat Tire
A flat tire can ruin your day, but fixing it doesn’t have to be complicated. Start by safely parking your vehicle on a level surface and turning on the hazard lights. Gather your tools—a jack, lug wrench, and spare tire.
Loosen the lug nuts before raising the car with a jack. Once elevated, remove those nuts completely and take off the flat tire. Replace it with the spare, tightening the lug nuts in a star pattern for even pressure.
Lower your vehicle back down and give everything one last check. You’re now ready to hit the road again with confidence!
Check and Top Off Fluids
Checking and topping off fluids is a crucial step in DIY car service. Your engine relies on various fluids to run smoothly, from coolant to brake fluid. Regularly inspecting these levels can prevent frustrating breakdowns.
Start by opening the hood and locating the dipsticks for oil and transmission fluid. Pull them out, wipe clean, reinsert, and check the levels again. If they’re low, top them off with the appropriate fluid specified in your owner’s manual.
Don’t forget about windshield washer fluid and power steering fluid as well. Keeping everything topped up ensures your vehicle operates efficiently on every drive.
Add Trailer Wiring
Adding trailer wiring can seem daunting, but it’s a straightforward DIY car service task. First, ensure you have the right wiring harness for your vehicle model. This helps you avoid compatibility issues that could complicate your project.
Once you’ve gathered the necessary materials, locate your vehicle’s taillight assembly. Careful disassembly is key to accessing the existing wires without causing damage.
Follow the instructions closely to connect the new harness securely. Proper connections will ensure that all lights on your trailer function correctly, making your towing experience safer and more efficient.
Re-Torque Your Wheels
Re-torquing your wheels is a crucial step in ensuring safety. After installing new tires or making adjustments, it’s essential to check the lug nuts. These fasteners can loosen over time due to vibration and road conditions.
Using a torque wrench allows you to apply the correct amount of force. This prevents damage from overtightening or leaving them too loose. Aim for the manufacturer’s specifications, which can often be found in your owner’s manual.
Regularly re-torquing helps maintain even wear on your tires and enhances overall vehicle performance. It’s a simple task that adds longevity to both your wheels and tires.
Test Your Battery
A reliable battery is crucial for smooth vehicle operation. Testing it regularly ensures you won’t be stranded with a dead car on an unexpected day. You can easily perform this test using a multimeter or a dedicated battery tester.
Start by connecting the tester to the battery terminals, ensuring proper contact. A healthy battery should show around 12.6 volts when fully charged. If it reads below 12 volts, consider charging or replacing your battery.
Pay attention to any signs of corrosion on the terminals as well; cleaning them can enhance performance and longevity significantly while maintaining your DIY car service routine.
Replace a Car Battery
Replacing a car battery is a straightforward task that every DIY enthusiast should master. Before you begin, ensure the vehicle is turned off and parked on a level surface. Gather safety gloves and glasses for protection.
Start by locating the battery under the hood. Disconnect the negative terminal first to avoid any short circuits, then remove the positive terminal. Carefully lift out the old battery and place in your new one, connecting terminals in reverse order—positive first this time.
Always check if your new battery fits snugly without wobbling. Dispose of your old battery responsibly at designated recycling centers to help protect our environment.
Change Transmission Fluid
Changing your transmission fluid is crucial for maintaining optimal vehicle performance. It helps keep the transmission cool and lubricated, ensuring smooth gear shifts. Over time, this fluid can become contaminated or lose its effectiveness.
Start by locating the transmission dipstick under the hood of your car. Check the level and color of the fluid; dark or burnt-smelling fluid indicates it’s time for a change.
To replace it, drain old fluid using a pan underneath and refill with fresh liquid through the dipstick tube. Regularly changing your transmission fluid will prolong its life and enhance driving experience.
Replace Your Wiper Blades
Replacing your wiper blades is a simple yet essential part of DIY car service. Over time, wipers can wear out or become damaged, resulting in streaks and reduced visibility. This not only affects your driving experience but also your safety on the road.
To replace them, first lift the arm away from the windshield. Then, slide off the old blade by pressing a tab or button. Align the new blade with the arm and snap it into place until you hear it click. Don’t forget to repeat this for both sides if needed.
Regularly checking and replacing your wiper blades will ensure you have clear visibility during rain or snow while maintaining optimal driving conditions throughout the year. With these tools in hand, you’re ready to tackle any DIY car maintenance task that comes your way!


