Changing your car’s engine oil is one of the most important and basic maintenance tasks that you can perform on your own. It helps keep the engine running smoothly, improves fuel efficiency, and prolongs the life of your vehicle. While the task may seem a bit daunting at first, it’s actually quite straightforward once you understand the process. This guide will walk you through how to change your car’s engine oil at home with easy-to-follow steps.
Why Changing Your Oil is Important
Engine oil lubricates the moving parts of your engine, reducing friction and preventing overheating. Over time, oil breaks down and collects dirt, debris, and metal particles, which can reduce its effectiveness. If not changed regularly, old oil can lead to engine wear, decreased performance, and potential damage. By regularly changing the oil, you ensure that your engine stays well-lubricated and performs efficiently, helping you avoid costly repairs down the line.
What You’ll Need
Before getting started, you’ll need a few essential tools and supplies:
- New oil (check your car’s manual for the correct type and quantity)
- A new oil filter
- A wrench (usually a socket wrench) to remove the drain plug
- An oil filter wrench
- A drain pan to collect old oil
- A funnel for pouring new oil
- A car jack and jack stands (if necessary)
- Rags or paper towels for cleaning up spills
Once you have everything prepared, you’re ready to start the oil change process.
Step 1: Warm Up Your Car
It’s a good idea to warm up your car for a few minutes before changing the oil. Warm oil flows more easily, allowing it to drain more thoroughly from the engine. Turn on the engine and let it run for about 5-10 minutes. Be sure to turn off the car and let it cool down slightly before you begin the oil change to avoid burns.
Raise the Car (If Necessary)
Depending on your car’s design, you might need to lift it to access the oil drain plug. Use a car jack to raise the front of your vehicle and secure it with jack stands for stability. Make sure the car is on a flat, level surface, and use caution when working underneath the vehicle.
Locate the Oil Drain Plug
Once the car is lifted, locate the oil drain plug on the underside of the engine. The drain plug is usually a large bolt at the bottom of the oil pan. Place your drain pan directly under the drain plug to catch the old oil.
Drain the Old Oil
Using your wrench, carefully loosen the oil drain plug by turning it counterclockwise. Once it’s loose, remove the plug by hand and allow the oil to drain into the pan. Be cautious, as the oil may still be hot. Let the oil drain completely, which should take about 5-10 minutes. Once the oil has stopped dripping, clean the area around the drain plug with a rag and reinstall the plug, tightening it securely with the wrench.
Replace the Oil Filter
Next, locate the oil filter. The filter is typically cylindrical and can be found near the engine block. Using an oil filter wrench, turn the filter counterclockwise to remove it. Be prepared for a little more oil to spill out when you remove the filter, so keep your drain pan underneath.
Before installing the new filter, apply a small amount of fresh oil to the rubber gasket on the top of the filter. This helps create a proper seal and makes it easier to remove during your next oil change. Screw the new filter into place by hand, tightening it until it’s snug. Avoid overtightening, as this can damage the gasket.
Add New Oil
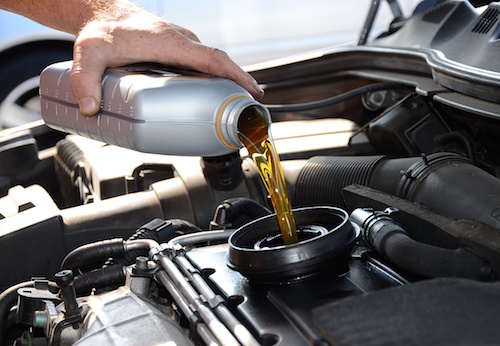
Now it’s time to add the fresh oil. Open the hood and locate the oil filler cap, usually found on the top of the engine. Remove the cap and insert a funnel to prevent spills. Pour in the recommended amount of oil for your vehicle, which can be found in the owner’s manual. Be careful not to overfill. Once the oil is added, replace the oil filler cap securely.
Check the Oil Level
After adding the new oil, start your car and let it run for a couple of minutes to circulate the oil throughout the engine. Turn off the car and wait a minute for the oil to settle, then check the oil level using the dipstick. Pull out the dipstick, wipe it clean with a rag, and insert it back into the dipstick tube. Pull it out again and check the oil level. The oil should be between the “low” and “full” marks on the dipstick. If the level is low, add a little more oil until it reaches the appropriate level.
Dispose of the Old Oil Properly
It’s important to dispose of the old oil and oil filter properly, as used motor oil is harmful to the environment. Most auto parts stores and service centers accept used oil and filters for recycling. Pour the old oil into a sealed container and take it to a recycling facility or collection point.
Conclusion
Changing your car’s engine oil at home is a cost-effective and satisfying way to maintain your vehicle. By following these steps, you can perform an oil change quickly and safely, ensuring your engine stays in optimal condition. Regular oil changes are essential for prolonging the life of your car and improving its overall performance, and with a little practice, you’ll find that it’s an easy task to perform at home.


